
Hardwood Installation Process
How Barnum Floors Installs Hardwood, Step-by-Step
Outlined below are the steps that the hardwood professionals at Barnum Floors will take to install hardwood in your home.
1
Step 1: Acclimate the Hardwood
It is critical that all hardwood acclimates to the current temperature and moisture level of your home. We will need to deliver your hardwood 2-14 days prior to installation, depending on the season and width. The hardwood must be placed inside your home, not in the garage or basement. The wood is clean, dry, and often only takes up the space of a small couch.
2
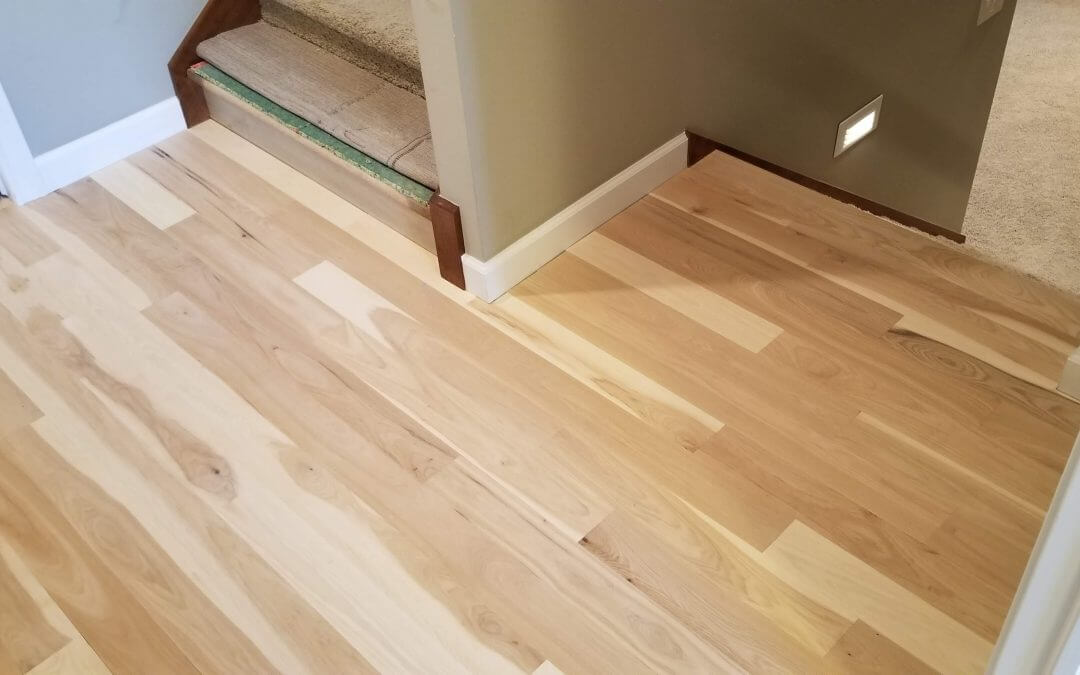
Step 2: Remove the Base Shoe & Measure Trim
Unless we are installing hardwood in a new construction home, it is necessary to remove all existing base shoe (quarter round), appliances, and furniture. If the installation areas were carpeted, your home will most likely need to have a base shoe installed around the bottom of the room. This piece of trim hides the space between your hardwood and the base trim that is left for the expansion and contraction of your home. Our trim carpenters will arrive prior to sanding to remove the existing base shoe and finalize measures for the new trim.
3
Step 3: Remove Existing Flooring
The next step is to remove any existing flooring, bringing us to the original subfloor. This will allow us to install a ¾” solid hardwood and create an even walking surface from one area to the next, eliminating the need for transitions. This also prevents the new flooring from ending up too high on your current base trim, thereby reducing the profile of your trim around your home. We will plastic off areas of your home as necessary to protect them, but remember, removing existing flooring can be a messy process!
If the area is carpeted, removing the carpet, pad, and tack strip will get us to the original subfloor. If the area is tile, vinyl, or laminate, this is often installed over a layer of ¼” or ½” plywood. We will remove all layers to reach the existing subfloor. The subfloor is then prepped for hardwood installation by sanding uneven areas and installing a layer of 15” roofing felt. This layer acts as a sound and moisture barrier. All flooring tear-out materials will be removed and disposed of by Barnum Floors. Now we’re ready for installation!
4
Step 4: Install the Hardwood
Our installation crews are the same employees who completed the tear-out of all previous flooring. They will begin to rack out the hardwood, installing opposite joists in your home. All flush floor registers are also installed at this time. If we are butting up to existing hardwood in the home, the installers will “sew” the new wood into the old wood. This will result in the new hardwood looking like it was part of the original floor.
5
Step 5: Start the Sanding Process
After the hardwood is installed, our crew will start the sanding process. On the day the sanding process begins, our crews arrive and prepare the home. We will plastic off any doorways or areas that are not being refinished. Although we have dustless sanding, occasionally dust can escape into the room. The plastic adds another layer of protection.
6
Step 6: Sand & Buff
The sanding of your hardwood floor involves numerous steps. The sanders start with a more aggressive grit sandpaper to remove the current finish and debris. They make several additional passes with various sanding equipment and finer sandpaper to produce a smooth, even surface. Once the wood is sanded, a buffer equipped with a very fine grit disc is used to blend the marks from the various sanding machines to remove all scratches and create a final, even surface. Finally, we tack the floor to remove any debris and apply the first coat of finish. It is best to stay outside of your home the night after this is completed.
7
Step 7: Finish Your Hardwood
The next step called the “back to backs,” varies depending on the type of finish you choose. If we are finishing with water-borne polyurethane, we will arrive the next morning, buff and tack the floor, then apply the second coat of finish. The third and final coat of polyurethane is applied within 2-4 hours after the second coat. This is done without buffing in between to maximize the finish layers. You can walk on the floor with stocking feet six hours after the final coat is applied.
If you choose oil-modified polyurethane, we will need to buff and coat on the second day, let the floor dry, then buff and spread a final coat on the third day. This option requires you to stay outside of your home for three nights. Burnished and waxed finishes are also available options.
8
Step 8: Put Your House Back Together
The following day we will arrive and begin to put your house back together. Appliances will be returned to their places, all base shoe will be installed, and any doors that have been removed will be re-hung. We may have removed your toilet or pedestal sink to complete this project. If so, a plumber will need to be called to reinstall these items to assure proper installation of plumbing fixtures, and we can arrange a plumber for you.
9
Step 9: Protect Your Hardwood Post-Installation
Protecting your hardwood floors will be the most critical component in keeping your investment looking new. We offer several options for you. We recommend you put sticky felt protection on all furniture and install wool “tap-ins” on all moving wooden furniture; including chairs, bar stools, and ottomans. These wool pads pound into the legs of your chairs and last for several years. Plastic wheels on rolling chairs must be replaced with rubber rolling wheels. Barnum Floors will provide you with a complimentary cleaning kit to get you started caring for your floor properly from the first day. We encourage our customers to enjoy their floors and remember; “this is a floor, NOT a piece of fine furniture.”